

Roof penetrations are any objects or openings that pass through the roof surface, such as plumbing vent pipes, chimneys, skylights, bath fans, furnace flues, satellite mounts, and electrical conduits. These areas are common leak points because they interrupt the roof’s continuous drainage surface.
Proper sealing does not usually mean applying a thick layer of caulk around the object. A durable repair combines correctly shaped flashing, compatible underlayment, properly placed fasteners, and a limited amount of sealant where the roofing system requires it.
Why do roof penetrations leak?
Most penetration leaks result from damaged flashing, incorrect installation, aging materials, or water being directed toward the opening instead of away from it. Sealant failure is often a symptom rather than the original cause.
Typical problems include:
- Cracked or shrinking sealant around a vent pipe
- A split rubber boot around plumbing
- Rusted or lifted metal flashing
- Exposed fastener heads
- Roofing installed over, rather than beneath, the upper flashing edge
- Missing underlayment around the penetration
- Ice, snow, or wind-driven rain forcing water beneath the flashing
- A chimney or wide curb that lacks an upslope cricket or saddle
Homes in Greene experience freeze-thaw cycles, snow, heavy rain, and summer heat. Those repeated temperature changes can make roofing materials expand and contract at different rates. A sealant that appears sound during a dry inspection may separate after a winter season.
What is the correct way to seal a roof penetration?
The correct method is to make the flashing carry water around the penetration while the sealant provides secondary protection. Sealant should not be expected to replace missing or poorly fitted flashing.
A typical installation follows this sequence:
1. Inspect the roof covering, deck, underlayment, and penetration itself.
2. Remove damaged roofing and failed flashing carefully.
3. Install compatible underlayment or self-adhering membrane around the opening.
4. Fit the flashing so water drains around the object and back onto the roof surface.
5. Reinstall the roof covering in the correct overlapping order.
6. Secure the flashing with approved fasteners placed where they will not create unnecessary leak paths.
7. Apply compatible sealant only at specified joints, exposed fasteners, or upper edges that require it.
8. Check the finished area for gaps, lifted edges, and places where water could collect.
The exact steps vary by roof type. Asphalt shingles, standing-seam metal, low-slope membranes, and tile roofs do not use identical flashing details.
How should plumbing vent pipes be sealed?
Plumbing vent pipes commonly use a manufactured roof jack or flashing boot. The base of the flashing should sit over or under the surrounding roofing layers according to the roof design, allowing water to flow downhill without entering beneath the flashing.
The rubber or elastomeric collar around the pipe must fit tightly. If it is split, brittle, distorted, or pulling away from the pipe, adding caulk over it is usually temporary. The boot generally needs replacement.
For a shingle roof, the lower portion of the flashing is normally integrated with the shingles so the shingles shed water over it. The upper portion is placed beneath the shingles or underlayment above the pipe. Reversing this overlap can create a channel for water to run directly into the roof assembly.
Plumbing vent pipes should remain open at the top. Foam, caulk, or other materials should not be used to block the vent opening.
How are chimneys and wide roof openings protected?
Chimneys and wide penetrations require more than a bead of sealant. They typically need step flashing along the sides and counterflashing built into the chimney or attached in a way that directs water onto the roof covering.
A wide obstruction on the upslope side can hold snow, leaves, and water. Current New York residential code provisions generally require a cricket or saddle behind a chimney or roof penetration wider than 30 inches, measured across the roof slope. This raised, sloped feature divides water and helps prevent ponding behind the obstruction.
Mortar joints, chimney caps, and masonry surfaces can also deteriorate. A roof leak near a chimney may originate in the chimney flashing, the masonry, the cap, or the roof covering several feet away. Water can travel along decking and framing before appearing indoors.
Should roof penetrations be sealed with caulk?
Caulk is useful, but it is not a substitute for flashing. It may seal a small joint between compatible materials, protect an exposed fastener head, or reinforce a manufacturer-designed flashing connection. It should not be used to create a raised dam around the base of a vent or skylight.
A suitable sealant must be compatible with the roof covering, flashing material, pipe, membrane, and expected temperature range. Some products adhere poorly to wet or dusty surfaces. Others can damage certain roofing membranes or react with metal.
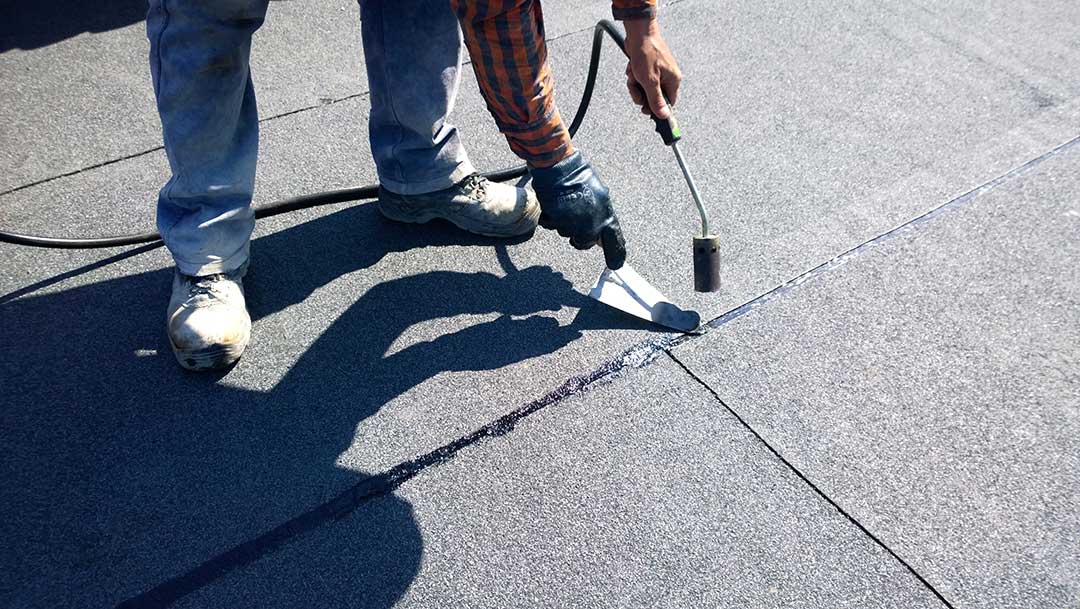
Avoid placing sealant where it blocks drainage channels or traps water behind flashing. A smooth, continuous joint is generally more reliable than a thick, irregular mound. Surface preparation matters: loose coating, dirt, frost, and failed sealant should be removed before a new compatible product is applied.
What about skylights, roof hatches, and mechanical equipment?
Skylights and roof hatches should use their designed flashing systems rather than improvised caulk repairs. Check the upper corners and upslope side first, because water and debris often collect there.
Roof-mounted equipment, electrical conduits, and antenna supports need properly shaped boots, curbs, or flashing collars. Mounting brackets should not be installed by simply driving screws through the roof and covering them with sealant. Each fastener creates a potential entry point, especially when movement or vibration loosens it.
If equipment must be attached to a roof, the flashing detail should account for drainage, service access, snow movement, and the roof manufacturer’s instructions.
How can a homeowner inspect a penetration safely?
A ground-level inspection can reveal many warning signs:
- Dark stains on ceilings or upper walls
- Damp attic insulation near a roof opening
- Rust around metal flashing
- Cracked or missing sealant
- Shingles that are lifted, curled, or missing near the penetration
- Water marks on roof decking
- A pipe boot that looks split or hardened
- Granules collecting in gutters below the area
An attic inspection during or shortly after rain can help locate moisture, but water may travel away from the actual entry point. A dry attic does not always prove that a penetration is watertight.
Walking on a wet, icy, steep, or damaged roof creates fall and roof-surface hazards. Chimney work, flue-related penetrations, and any repair requiring work near electrical equipment deserve extra caution. Repairs involving combustion vents must preserve required clearances and weatherproofing rather than simply sealing around the outside.
How often should roof penetrations be checked?
Inspect them at least twice each year and after severe wind, heavy snow, ice buildup, or a major storm. Spring inspections are useful because freeze-thaw damage may appear after winter. A fall inspection can identify split boots, loose flashing, and exposed fasteners before snow arrives.
Sealant is not permanent maintenance. If the surrounding flashing is corroded, loose, cracked, or incorrectly layered, resealing may hide the problem for only a short time. The dependable repair is the one that restores the drainage path and integrates the penetration with the entire roof system.
