
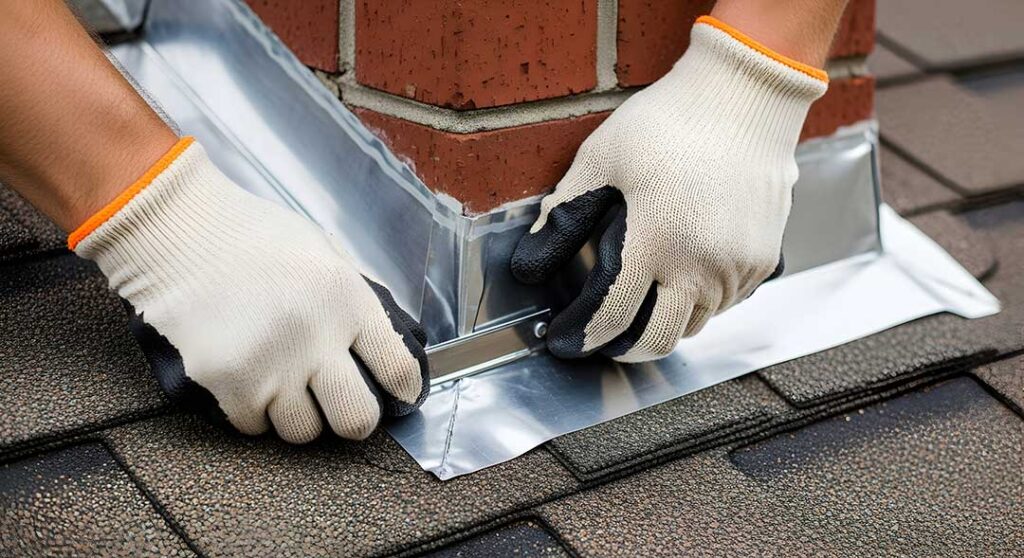
Roof penetrations are any openings or objects that pass through the roof surface, including plumbing vents, exhaust fans, chimneys, skylights, satellite mounts, electrical conduits, and roof-mounted equipment. These areas deserve special attention because water, wind-driven rain, melting snow, and ice can work their way beneath roofing materials where a simple bead of caulk cannot stop them.
In Greene, NY, freeze-thaw cycles, winter snow, spring rain, and summer storms can expose weak flashing quickly. Proper sealing depends less on adding more sealant and more on building a layered water-shedding system.
What is the correct way to seal a roof penetration?
The correct method is to combine flashing, compatible underlayment, and carefully installed roofing materials. Sealant is a secondary defense, not the primary waterproofing system.
A properly sealed penetration generally includes:
- A flashing component shaped for the penetration
- Underlayment or a self-adhering membrane integrated with the roof deck
- Roofing material installed so water flows around, not behind, the flashing
- Sealant used only where the flashing design calls for it
- Fasteners placed in protected locations and sealed when necessary
The arrangement must direct water downhill. If a flashing piece is installed over an upslope layer that should have been above it, water can be guided beneath the roof covering.
Why is caulk alone not enough?
Caulk may appear watertight when first applied, but it can shrink, crack, harden, or separate as the roof expands and contracts. Snow and ice can also pull on exposed sealant, while ultraviolet sunlight gradually weakens some products.
Sealant can be useful around specific joints, fastener heads, and edges, but it should not replace a damaged pipe boot, missing step flashing, improperly lapped membrane, or deteriorated chimney flashing.
A common warning sign is a thick mound of old sealant around a pipe or vent. That often indicates repeated patching rather than a lasting repair. If the underlying flashing is split, rusted, loose, or incorrectly layered, more sealant usually delays the leak instead of solving it.
How are plumbing vent pipes sealed?
Plumbing vent pipes typically use a flashing boot. The boot has a metal or flexible base that fits beneath or over the roofing layers and a collar that fits around the pipe.
For a typical shingle roof, the base is installed so its lower portion sits over the shingles below the pipe, while the upper portion is integrated beneath the shingles above the pipe. This allows rain and melting snow to continue down the roof.
The pipe collar must fit tightly without crushing or distorting the boot. If the rubber or flexible collar is cracked, split, loose, or deteriorated, it should not be treated as a cosmetic issue. Replacing the boot is usually more reliable than coating the damaged area.
The flashing must also match the roof covering and slope. A component designed for one roofing system may not perform correctly on another.
How should the underlayment be installed around a penetration?
Underlayment should be integrated from the lower side upward, creating shingle-like overlaps. The downslope portion is installed first, followed by side pieces and an upslope piece that laps over the lower layers.
A self-adhering membrane can provide an additional seal around the opening, especially in cold climates where wind-driven rain, snow, and ice dams may challenge the roof edge. The membrane should be cut neatly, pressed firmly to clean surfaces, and overlapped according to the roofing system’s instructions.
It should not block drainage paths or be wrapped carelessly around a penetration in a way that traps water. The roof deck must be dry and sound before applying any membrane. Dust, frost, moisture, and loose fibers can prevent proper adhesion.
How are chimneys and wide roof penetrations protected?
Chimneys require more than surface caulk. Their flashing system normally includes base flashing, step flashing where the chimney meets the roof slope, and counterflashing cut into or secured to the chimney masonry.
A chimney wider than 30 inches measured across the roof slope may require a cricket or saddle on its upper side. This raised structure divides water and snow so material does not accumulate against the chimney. In a snowy climate, this detail can be especially important.
Masonry joints, chimney caps, and flashing edges should be inspected separately. A leak appearing near a chimney may originate higher up at cracked mortar or a damaged cap rather than at the roof-to-chimney joint.
What about skylights, exhaust vents, and roof-mounted equipment?
Skylights should use the manufacturer’s flashing system and underlayment details rather than improvised sealant. Their upper, lower, and side flashing pieces must be integrated with the roof covering in the correct sequence.
Bathroom and kitchen exhaust vents should discharge outdoors through dedicated roof or wall terminations. The duct should be insulated where required and should not simply release moist air into the attic. Warm, humid air entering a cold attic can contribute to condensation, wet insulation, mold growth, and wood deterioration.

For electrical conduits, antenna supports, or other mounted equipment, the attachment method must preserve the roof’s drainage layer. Penetrations should not be made casually through shingles, metal panels, or membrane roofing. Some equipment can be mounted without creating a new hole, while other installations require specialized flashing.
How can residents identify a failing roof penetration?
Look for signs both outside and inside the building. Exterior symptoms may include:
- Cracked or missing sealant
- Rusted, bent, or lifted flashing
- Split rubber around vent pipes
- Shingles curling or loosening near the penetration
- Dark staining below a pipe boot or chimney
- Exposed fasteners or loose metal
- Snow or debris collecting behind a wide obstruction
Interior symptoms may include brown ceiling stains, damp insulation, peeling paint, musty odors, or moisture that appears only during wind-driven rain. A leak may travel along rafters or roof decking, so the interior stain may not be directly below the penetration.
Attic inspection is safest from the floor or a stable access area. Walking on roof decking between framing members can cause injury or damage ceilings below.
Which sealants are suitable for roof work?
The sealant must be compatible with the roofing material, flashing metal, membrane, temperature range, and expected movement. Roofing products are not interchangeable. A sealant suitable for asphalt shingles may not adhere properly to certain metals, plastics, or rubber components.
Avoid applying random household caulk, expanding foam, or coatings over a wet or dirty surface. Foam can obstruct ventilation or conceal a leak, while incompatible chemicals may soften membranes or damage flashing.
Product instructions should be followed for surface preparation, curing temperature, joint size, and exposure limits. In cold weather, many sealants will not bond or cure properly unless the materials and surfaces remain within the specified temperature range.
When is roof penetration work unsafe to do independently?
Roof work becomes hazardous when surfaces are wet, icy, steep, high, or difficult to access. Electrical service penetrations, chimney work, skylights, fragile roofing, and suspected structural damage also require particular caution.
New York’s current residential code includes requirements for flashing around roof openings and penetrations, and local permit or inspection rules may apply depending on the scope of work. Code-compliant installation also depends on the roofing manufacturer’s instructions.
A small, visible sealant repair may be manageable from a safe position, but replacing flashing, opening roofing layers, working near electrical equipment, or correcting an improperly framed penetration should be treated as higher-risk work. Proper sealing is ultimately a roof-system task, not simply a caulking task.
